
在本教程中,你将学习在 Workers 上构建 SMS 通知系统,以接收 GitHub 仓库的更新。当仓库有新活动时,Worker 将使用 Twilio 向你发送短信更新。
你将学习如何:
- 使用 Workers 构建 webhook。
- 将 Workers 与 GitHub 和 Twilio 集成。
- 使用 Wrangler 管理 Worker secrets。
所有教程都假设你已经完成了快速入门指南,该指南帮助你设置 Cloudflare Workers 账户、C3 ↗ 和 Wrangler。
首先,使用 npm create cloudflare@latest 在命令行中创建 Worker 项目:
npm create cloudflare@latest -- github-twilio-notificationsyarn create cloudflare github-twilio-notificationspnpm create cloudflare@latest github-twilio-notifications进行设置时,请选择以下选项:
- 对于 What would you like to start with?,选择
Hello World example。 - 对于 Which template would you like to use?,选择
Worker only。 - 对于 Which language do you want to use?,选择
JavaScript。 - 对于 Do you want to use git for version control?,选择
Yes。 - 对于 Do you want to deploy your application?,选择
No(部署前我们还会做一些修改)。
记下应用部署到的 URL。配置 GitHub webhook 时会用到。
cd github-twilio-notifications在新的 github-sms-notifications 目录中,src/index.js 代表 Cloudflare Workers 应用的入口点。本教程的大部分内容将配置此文件。
你还需要 GitHub 账户和仓库来完成本教程。如果尚未设置,请创建新的 GitHub 账户 ↗并创建新仓库 ↗以继续本教程。
首先,为仓库创建 webhook,以便将更新 POST 到你的 Worker。在 Worker 内部,你将解析这些更新。最后,向 Twilio 发送 POST 请求以向你发送短信。
你可以在此 GitHub 仓库 ↗ 查看完整代码。
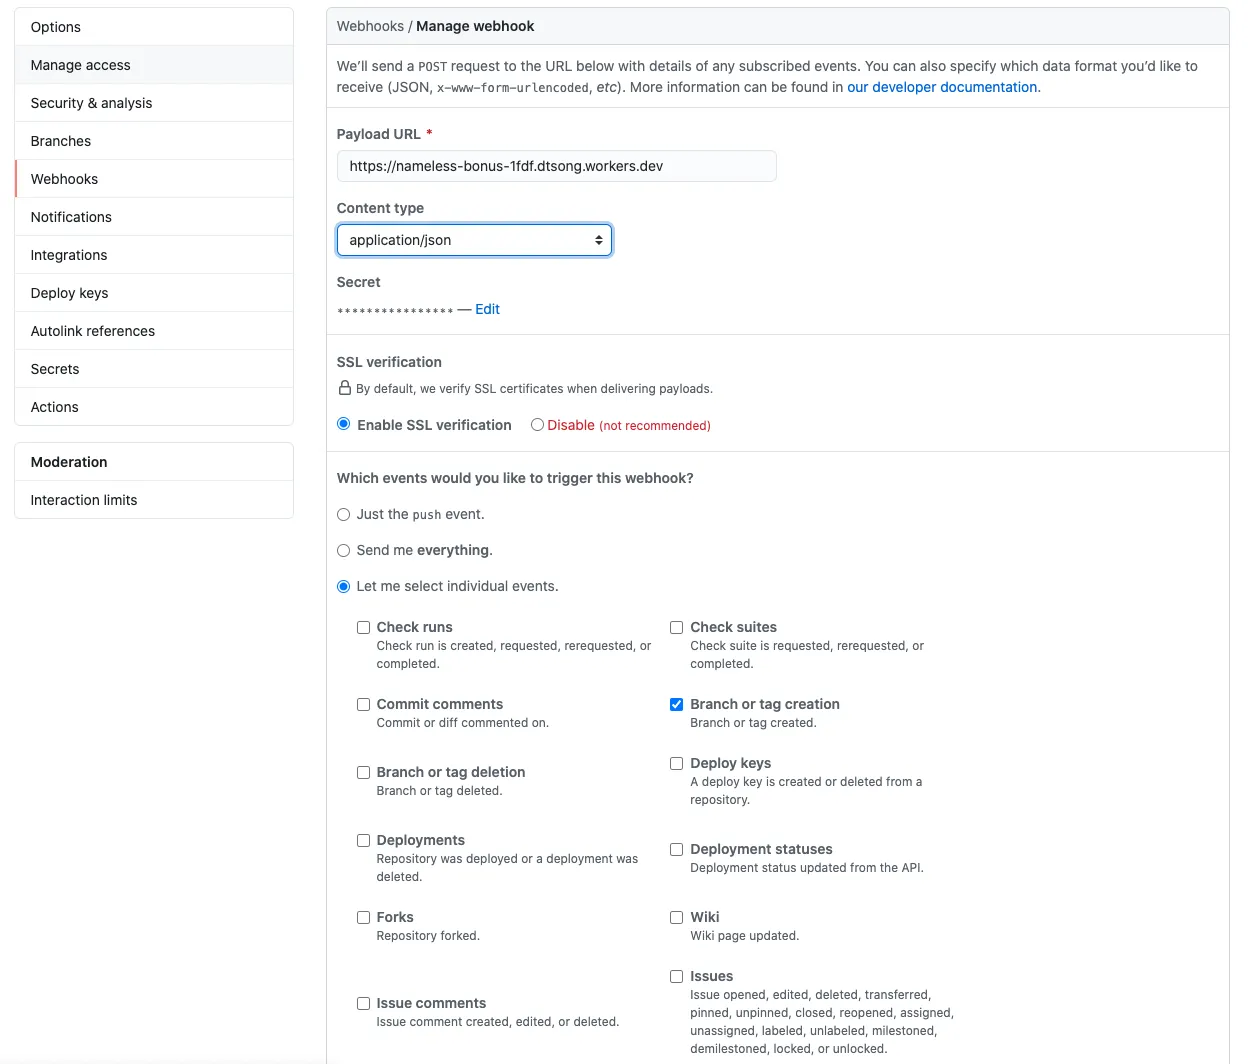
首先,配置 GitHub webhook,在仓库有更新时 POST 到你的 Worker:
-
前往 GitHub 仓库的 Settings(设置) > Webhooks > Add webhook(添加 webhook)。
-
将 Payload URL 设置为应用首次部署时记下的 Worker URL 上的
/webhook路径。 -
在 Content type(内容类型) 下拉菜单中,选择 application/json。
-
在 Secret(密钥) 字段中,输入你选择的 secret 密钥。
-
在 Which events would you like to trigger this webhook?(希望哪些事件触发此 webhook?) 中,选择 Let me select individual events(让我选择单个事件)。选择要接收通知的事件(如 Pull requests(拉取请求)、Pushes(推送) 和 Branch or tag creation(分支或标签创建))。
-
选择 Add webhook(添加 webhook) 完成配置。
本地环境设置完成后,使用 Worker 解析仓库更新。
最初,生成的 index.js 应如下所示:
export default {
	async fetch(request, env, ctx) {
		return new Response("Hello World!");
	},
};
使用 Request 的 request.method 属性检查到达应用的请求是否为 POST 请求,如果不是则发送错误响应。
export default {
	async fetch(request, env, ctx) {
		if (request.method !== "POST") {
			return new Response("Please send a POST request!");
		}
	},
};
接下来,验证请求是否使用了正确的 secret 密钥。GitHub 使用 secret 密钥为每个 payload 附加哈希签名 ↗。在请求上使用名为 checkSignature 的辅助函数以确保哈希正确。然后,通过将请求解析为 JSON 访问 webhook 数据。
async fetch(request, env, ctx) {
  if(request.method !== 'POST') {
    return new Response('Please send a POST request!');
  }
  try {
    const rawBody = await request.text();

    if (!checkSignature(rawBody, request.headers, env.GITHUB_SECRET_TOKEN)) {
      return new Response("Wrong password, try again", {status: 403});
    }
  } catch (e) {
    return new Response(`Error:  ${e}`);
  }
},
checkSignature 函数将使用 Node.js crypto 库,用已知 secret 密钥对收到的 payload 进行哈希,以确保与请求哈希匹配。GitHub 使用 HMAC hexdigest 以 SHA-256 格式计算哈希。你将此函数放在 index.js 文件顶部,export 之前。
import { createHmac, timingSafeEqual } from "node:crypto";
import { Buffer } from "node:buffer";

function checkSignature(text, headers, githubSecretToken) {
	const hmac = createHmac("sha256", githubSecretToken);
	hmac.update(text);
	const expectedSignature = hmac.digest("hex");
	const actualSignature = headers.get("x-hub-signature-256");

	const trusted = Buffer.from(`sha256=${expectedSignature}`, "ascii");
	const untrusted = Buffer.from(actualSignature, "ascii");

	return (
		trusted.byteLength == untrusted.byteLength &&
		timingSafeEqual(trusted, untrusted)
	);
}
要使此功能正常工作,你需要使用 wrangler secret put 设置 GITHUB_SECRET_TOKEN。此 token 是配置 GitHub webhook 时选择的 secret:
npx wrangler secret put GITHUB_SECRET_TOKEN向 Wrangler 文件添加 nodejs_compat 标志:
{
	"compatibility_flags": [
		"nodejs_compat"
	]
}
compatibility_flags = [ "nodejs_compat" ]你将使用 Twilio 发送有关仓库活动的短信。你需要 Twilio 账户和能接收短信的手机号码。请参阅 Twilio 指南进行设置 ↗。(如果你是 Twilio 新用户,他们有一个互动游戏 ↗,你可以在其中学习如何使用其平台,新用户还可获得免费额度。)
然后,创建一个辅助函数,通过向 Twilio API 端点发送 POST 请求来发送短信。请参阅 Twilio 参考文档 ↗了解更多关于此端点的信息。
创建名为 sendText() 的新函数来处理向 Twilio 发送请求:
async function sendText(accountSid, authToken, message) {
	const endpoint = `https://api.twilio.com/2010-04-01/Accounts/${accountSid}/Messages.json`;

	const encoded = new URLSearchParams({
		To: "%YOUR_PHONE_NUMBER%",
		From: "%YOUR_TWILIO_NUMBER%",
		Body: message,
	});

	const token = btoa(`${accountSid}:${authToken}`);

	const request = {
		body: encoded,
		method: "POST",
		headers: {
			Authorization: `Basic ${token}`,
			"Content-Type": "application/x-www-form-urlencoded",
		},
	};

	const response = await fetch(endpoint, request);
	const result = await response.json();

	return Response.json(result);
}
要使此功能正常工作,你需要设置一些 secrets 以在源代码中隐藏 ACCOUNT_SID 和 AUTH_TOKEN。可以在命令行中使用 wrangler secret put 设置 secrets。
npx wrangler secret put TWILIO_ACCOUNT_SID
npx wrangler secret put TWILIO_AUTH_TOKEN
修改 githubWebhookHandler,使用刚创建的 sendText 函数发送短信。
async fetch(request, env, ctx) {
  if(request.method !== 'POST') {
    return new Response('Please send a POST request!');
  }
  try {
    const rawBody = await request.text();
    if (!checkSignature(rawBody, request.headers, env.GITHUB_SECRET_TOKEN)) {
      return new Response('Wrong password, try again', {status: 403});
    }

    const action = request.headers.get('X-GitHub-Event');
    const json = JSON.parse(rawBody);
    const repoName = json.repository.full_name;
    const senderName = json.sender.login;

    return await sendText(
      env.TWILIO_ACCOUNT_SID,
      env.TWILIO_AUTH_TOKEN,
      `${senderName} completed ${action} onto your repo ${repoName}`
    );
  } catch (e) {
    return new Response(`Error:  ${e}`);
  }
};
运行 npx wrangler deploy 命令重新部署 Worker 项目:
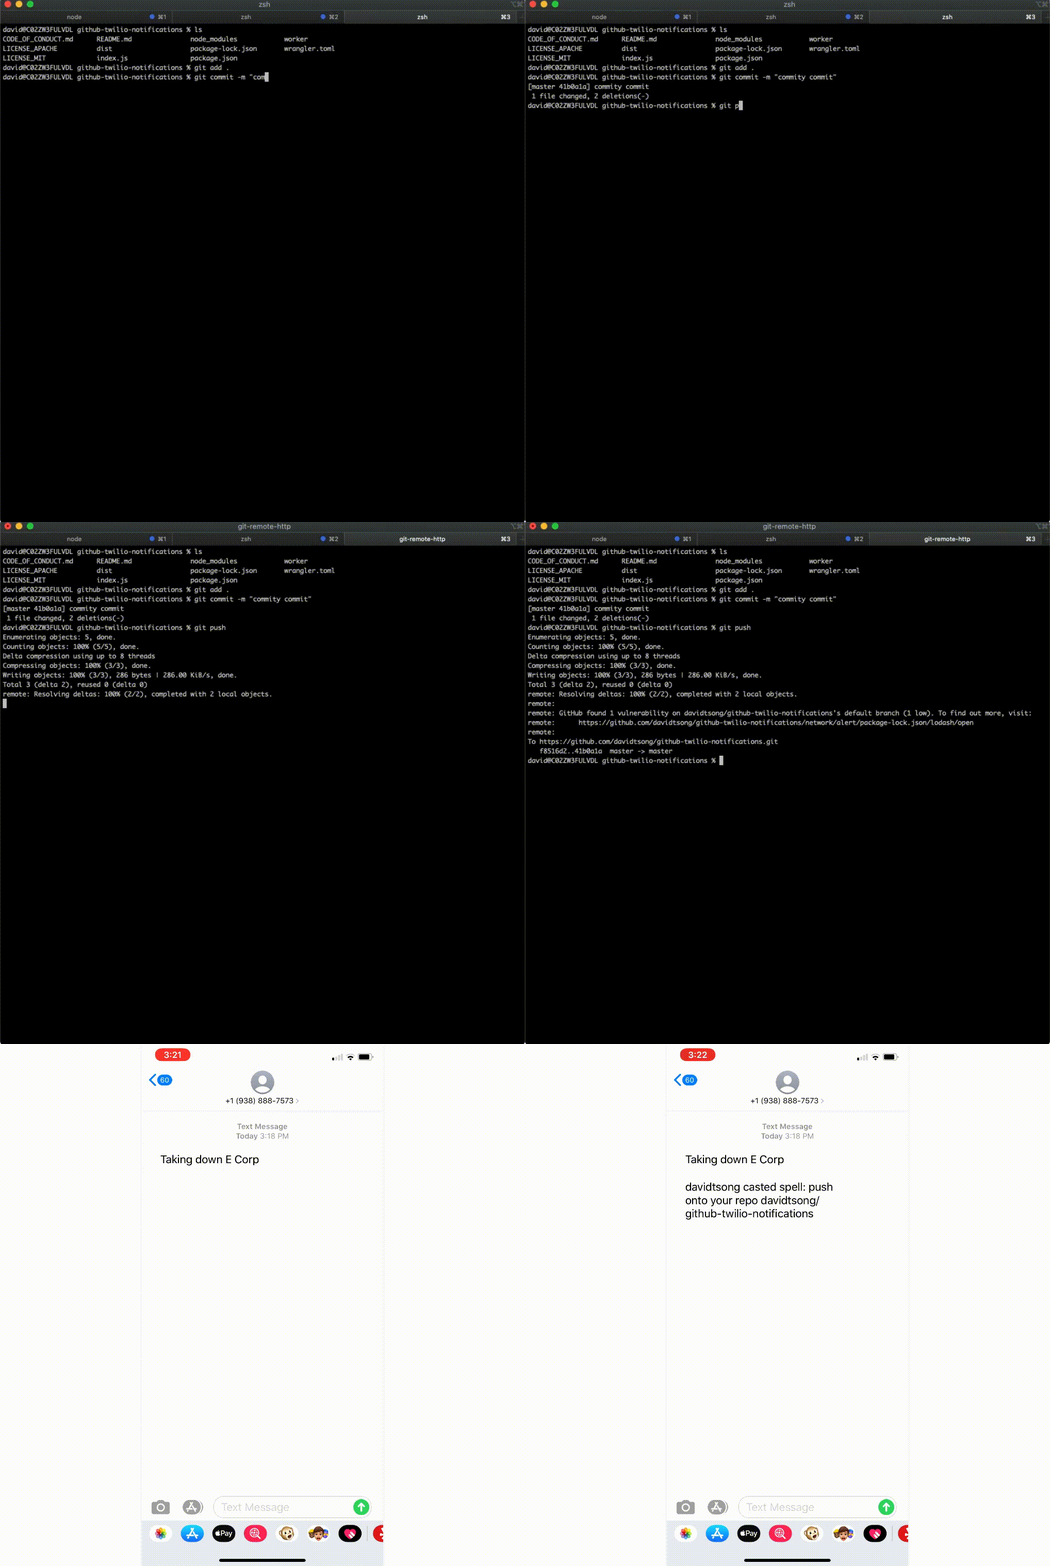
npx wrangler deploy现在,当你对仓库进行更新(在 GitHub Webhook 设置中配置的)时,很快就会收到短信。如果你从未使用过 Git,请参阅 GIT Push and Pull 教程 ↗了解如何推送到仓库。
完整代码请参阅 GitHub ↗。
完成本教程后,你已学会如何使用 Workers 构建 webhook、将 Workers 与 GitHub 和 Twilio 集成,以及使用 Wrangler 管理 Worker secrets。